https://docs.google.com/document/d/1HOYD3WKyeUvSYMuN8DG_EMikBtAI1nU4CSCr-NBMjaA/edit?usp=sharing
Creative Critical Reflection
https://docs.google.com/document/d/1NnxQKpiNuI5mIyMdzEBk2hTxOmGNgSJwnYseSQreinY/edit?usp=sharing
Sources Used.
- https://www.filmsite.org/dramafilms.html
- https://www.shmoop.com/the-maze-runner/symbolism-imagery.html
- http://www.audienceseverywhere.net/giver/
- https://a24films.com/films
- https://www.ceros.com/originals/a24-films/
- https://jameystegmaier.com/2016/10/why-do-actors-have-to-wear-makeup/
I did not include this in my CCR, but I have a few people I would like to thank that helped me complete this title sequence.
First, I would like to thank my partner Kyler for sticking with me and creating this together
I would also like to thank Mr Engle for the help he has provided me whether it be in correcting my first rough cuts or providing advice on the sound.
Various students helped me by providing a lot of feedback both on my blog and on my rough cuts. These include; Taylor Moore, Sitara Sriram, Pierce Thomas, and Angelica Gonzales. Thank you.
Creating my CCR
To complete my project, I must complete a Creative Critical Reflection. Mine will be a sit down style where I talk to the camera and pictures will come up on screen. In this CCR, I have to answer four basic questions.
How do your products use or challenge genre conventions and how do they represent social groups or issues?
- Dystopian film, confines to the conventions
- Teenaged people to show “kids are the future”
- Monochromatic color scheme
- Look of an abandoned society
- Representation of two contrasting social classes
How did your production skills develop throughout the project?
- Previously only edited one project
- Consulted multiple YouTube videos
- Saw that communication is the best method
- Realized that continuity can be harder than you thought
- You won’t always get the exact shots you want, you have to adjust
- Became confident in editing skills
How did you incorporate technology into this project?
- iPhone XR
- iMovie
- small mic
- Keynote
- YouTube
How do your products engage with the audience and how would they be distributed as real media products?
- Boy and Girl audience
- PG-13
- A24 studios as production and distribution
- limited theatrical release followed by Netflix release
Its been awesome blogging with you!! My next posts will contain my CCR followed by my final draft of Joumbre!! Bye!
Sounds, Sounds, and more Sounds.
Sound plays an extremely important role in any and every film ever made. Even the smallest thing like clothes rustling make the movie feel more like real life. Sound is used to fully immerse the viewer and overall make the piece something more wholistic.
Diegetic Sounds
Diegetic sounds are all the sounds that come from inside the world the viewers are watching. If you were a character, you would be able to hear it. For Joumbre, Diegetic sounds made up most of the sounds we included. We included:
- footsteps from both characters individually
- footsteps coming from a group of people
- dialogue
- nature/ambient sounds
- bird whistling
- vivian breathing heavy
- trees rustling around
These various sounds were combined in different ways to make Joumbre sound like a real forest. I muted all of the sounds from the video since there was a lot of talking and car sounds that would break the allusion that the audience has.
Diegetic Sounds
Diegetic sounds are the sounds that characters on-screen cannot hear. We only implemented this in two ways
- voice over
- music
For the voiceover, we felt like it was necessary to include some for of description of the world they are currently in, since this fits in with the genre conventions of dystopian films.
We also included a song, written by Sextile and Devon Church . These songs have no lyrics. I don’t really know how to talk about music but the Sextile song is much more intense and we included this one layered with the Church song during the chase scene. This brought drama to the scene and made it much more intense. These songs were found in the YouTube creators studio!
Some Sources I have Used to Help Me!
This blog post is going to be an in-depth look at a few different sources I have used to teach me how to edit my project to get the look I want. I have only ever edited one small project before, and it was fairly simple with no color correction or anything like that. Editing Joumbre has posed many challenges for me and it was vital that I do some online research about how to use iMovie.
This is the first video I watched. As said in the title, it taught me how to darken my footage, since I wanted some clips to look like it was dark outside. This video was super short, under a minute long, and I felt like I needed a bit more help to really figure out what I wanted. It also used a much older version of iMovie (it was posted in 2012) and so it didn’t really show me exactly what I wanted. Altogether, it was not very helpful.
This article from apple support helped direct me to the correct area to play around with some color correction and mess with the dark and lightness on my own. This was very helpful because I got a good feel for how to mess with the colors. It also guided me to the ‘Match Color’ option that became one of the most important tools in making my project.
https://filmora.wondershare.com/video-editing-tips/how-to-invert-video-imovie.html
This source helped when it came to flipping my videos since a few of the clips in my montage broke the 180 rule and disoriented the viewer. This was a very helpful source as it got straight to the point.
This video was especially helpful. I struggled for quite a while on how to make our titles look how we wanted, but the standard iMovie fonts did not suit our purpose. This video showed me how to use the green screen effect and be able to pick my own font. I watched other videos that showed similar things to they were not as in depth and many had no voiceover which made me confused.
I used this video to learn how ADR is important and a few basic tips on how to do it. The man talked very fast so quite a lot of information was included which is great since I knew basically nothing about it. The tips were helpful except many of them applied to more professional filmmakers (in reference to equipment used and budget). Over this taught me a lot and significantly improved my audio.
Adding Titles!
I had no idea adding titles would be as stressful as it has become. First of all, I think we all know that iMovies titles/transitions are not up to par and are very limited in customizability. Currently I am sifting through multiple similar fonts in order to find the best one to fit our dystopian film.
Choosing the Font and Style

These are the fonts I tested, and ultimately decided to go with the first font, Roadway. Initially this was my favorite font but I figured I would look around a little more and maybe there would be a better one. We liked that this font was already bolded and the fun fair that comes with the capital letter size.
In our project, we plan to have our main title ‘Joumbre’ written in all caps on the screen. This fits with other titles in our genre, for example,


.
.
.
For the opening credits we are going to go with the first letter capitalized and the rest lower case. This will add some flair and dimension to our lettering that would be otherwise boring.
Actually Putting Them Into Our Title Sequence
The Title
Now this part was a struggle. After asking around and do research at home, I found an effective method of adding custom titles using Keynote and the green/blue screen option on iMovie.
The first thing I did was choose the transition of our title. After watching a bunch of different entrances/exits, I decided that ‘Joumbre’ would enter the screen with an iris, and exit with a dissolve. These two looked the most clean and fit the look we wanted.

This is what it looked like in the first stages!! (everything except the font changes by the end)
The first color option I had picked out was a dark forest green. I figured this would go nicely with the way our filmed looked, as many of the colors were very natural and neutral (as planned). This did not work out however since it matched so nicely with our film it blended in far too much and was difficult to see.
After seeing this my partner and I decided we should go with something less green.

This was my second attempt. This khaki gold color in my opinion looked quite nice, but it still lacked the vibrancy to make it stand out and be really noticeable (and the size should probably get bigger)

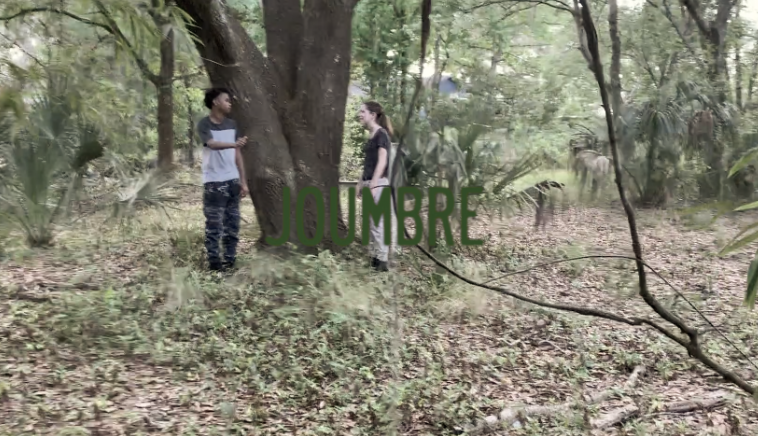
We ended up with this as our final color and size! Our title appears within the first shot of the movie, and will be followed by opening credits.

To put this into our title sequence, I saved the Keynote slide as a movie, and then dragged it into iMovie. From here I just placed it where I wanted and clicked the green screen feature and boom! There she is
.
.
The Credits
The credits we are going to include are:
- production company
- two actors (vivian chandler, kyson dickerson, kyler dickerson, everett chandler)
- music by kyler
- edited by ava
- cinematography by kyler
- produced by ava and kyler
- directed by ava
- sound production by ava and kyler
For the first two minutes and our limited staffing, I think that this is an appropriate amount to include.
Wow. Okay so I made that ^ paragraph before I actually started inputting the actual credit titles. That was a very grueling process (and I may be exaggerating a little but I’ve spent over an hour on ONE credit and needless to say I am tired of doing this).

I tried 10 (!!) different credits and literally only the tenth one worked. The first one was the same color as the title, but in the way i had it positioned it blended in with the background too much. Then I messed around with other colors, some dark greens, dark purple, grey, even plain old black. Since I was using the green/blue screen, iMovie was removing all the blue and green colors, which made all my titles look splotchy and not at all crisp. Eventually after much stress I decided to go back to my original color, but change the positioning so that it is more visible. I wish I would have thought of that sooner, but at least I now know.

Anyways, here is my first semi successful attempt. After talking to my peers and showing them the results, they thought that I should make the text lighter in more of a cream shade rather than a mustard yellow.

This is what we have decided to go with. We will be keeping the title card the same mustard yellow color, and all the other credits will match this cream. My partner did think that this color change may look tacky, but honestly it is the best option we have.
That is the progress I have made with the titles! By the end of it all I made 28 different versions and sent well over three hours trying to figure out the ins and outs.
Diary Entry Two
Our second and final day of filming! This day we reshot everything we filmed on day one and added a few more scenes.

We changed locations which meant we needed to scout a new tree. I walked around the property a few days before hand and took pictures of all the possible trees we could use for our actor to sit in. The tree ended up being the best choice, although the original tree from the rough cut was much more comfortable and easy to get in.


Kyson had quite a lot of trouble getting into the tree and sitting in a comfortable position. We took multiple photos of Kyler sitting in the tree and kept showing him and instructing him on how to position his legs and arms.

Kyler, being the cinematographer, filmed all of our shots while I was the director, working closely with the actors and making sure they knew exactly what to do.


.
.
.
.
.
My dad also came with us to make sure we were okay and he captured a few shots of Vivian running from a different angle (that does not break the 180 rule). This was super helpful for creating a few seamless transitions.

We stayed until about 8 o clock because we wanted to see how some of the shots would look in the dark. Clearly, not so good. The camera quality severely decreased and turned out looking very bad, which was disappointing, but expected.

We also filmed our sounds! These are not final but most of them are very good and will be used for our final title sequence!
All and all this was a really successful filming day!
Rough Cut Part 2!
This our second rough cut. We went to a new location, our second choice mentioned in my blog close to my house. We reshot every shot and ended with this! As the editor, I have already done a lot of color correction. For our final we will need to add sound, flip a few of the shots during the montage, and maybe reshoot the last 2 scenes.
Overall I am pretty proud of the way this looks
- https://filmora.wondershare.com/video-editing-tips/how-to-invert-video-imovie.html (this is the cite I used to flip the frames that I discussed we needed to add, I didn’t know where else to put it because I will not be adding a separate blog post about)
Difficulties We Encountered When Filming
Filming in the outdoors presented more challenges then we expected.
Bugs
The first of which was the bugs. We don’t have any good footage that conveys the amount of insects that was flying and crawling all over us. This is because we told our actors to pretend they are not there when he cameras are rolling in order for us to utilize every shot we took.
Our actor Kyson was especially struggling with the bugs. This involved multiple outburst and constant swatting. Both Kyler and I got bit by something (I made the grand decision to wear shorts), and all the people present got plenty of mosquito bites. Next time we will definitely bring bug spray
Lighting
Another issue that is actually present in our film is the lighting. Since we are filming exclusively with natural light, the lighting depends on the weather and the visibility.


.
This variance in lighting occurs because of the sun peaking through the trees and only highlighting some parts of the frame. We are unsure on how to fix this, but we are considering just editing it in post production
Environment Struggles

We also had to deal with the ferns growing on the tree that Kyson was required to sit in. These ferns contained bugs and made the tree really uncomfortable to sit in. This also freaked Kyson out (he complained a lot). Multiple times he threatened to jump out of the tree/refused to get in it/forced Kyler to pay him. This definitely extended our filming time and caused some frustration between the brothers.
Actors

Our actors are not exactly professionals, and that is clear through there emotions. Vivian remained smiling through all of her scenes, and we did not catch this till we went to edit them. In a few shots with Kyson, you could tell he wasn’t thrilled to be there. We were able to fix that tho for a few shots and ended up using those.
Kysons attitude was not the best. He was constantly bickering with Kyler over how the shots were being filmed and about how he didn’t want his shoes to get dirty. Its okay though since we worked everything out, it just took a little longer than we would have liked.
Flashlight

We used a flashlight in one of the scenes to show that she was being chased. These scenes did not at all turn out how we wanted. I am going to try and edit them to make the scene look more suspicions but we may end up having to refilm it.
Darkness

We had the grand plan of filming a limited number of shots in the dark, this is a mistake because my camera (iPhone XR) does not film well in the darkness. The shots came out very grainy and ugly, but we included it in the rough cut and will have to refilm.
Color Correcting and Editing
Darkening the Scene
Currently, I am working on editing our title sequence! I am struggling a bit with matching the colors of the clips, since some of them were filmed in the night and the others were filmed in the day. There is a feature on iMovie called “match color”. Basically it takes one shot and attempts to match it to the colors of another. I am using this to keep the saturation levels even throughout, and to attempt to match the colors of the darkness to the bright scenes. I will admit it looks a little wonky and will need adjustment after but it is a good start.


.
.
.
.
These two clips were matched with the color matching tool. I also went in and further adjusted the saturation and contrast. They are fairly similar, the main difference is the color of her clothing but I will work to fit it.
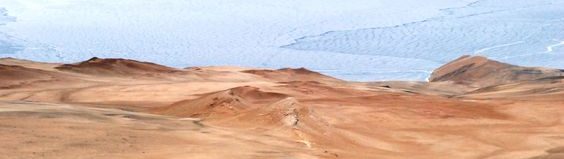
We also want to show the passage of time, from day to night. This would require a gradual change in lightness through out the film.
Convey the Passage of Time


.
.
.
.
These two photos are only 2 shots apart, yet their colors differ drastically. My partner and I think this accurately conveys the passage of time.
Lower Saturation
To fit in the genre conventions of dystopian films and to achieve the look we want, I am going to edit all of the shots to have a lower saturation. The look of washed out color will mimic the way the happiness and freedom is drained out of our characters and their society.


.
.
.
.
This is a before and after with just a change in saturation. There is a dramatic difference (also not sure if this is real but I feel like the iPhone XR camera ups the saturation automatically because when I compare the same picture to a different phone the XR’s colors are much more vibrant). I do plan to add many a deeper contrast but just in general mess around with it little more to find the look we want.
